There is a moment every creator hits where the content is fine but the footage looks cheap, and no amount of editing fixes it. Almost always it comes down to settings. The camera was guessing, it guessed wrong, and it kept changing its mind mid-shot.
This is the settings side of shooting. If you want the light and framing side, that is in our mobile photography guide. Here we are dealing with numbers.
The three settings that decide the image
Everything else is a variation on these.
Shutter speed is how long the sensor is exposed for each frame. Fast shutter freezes motion and looks harsh and stuttery in video. Slow shutter blurs movement and looks smooth. For video you want it tied to your frame rate, which is the rule below.
ISO is sensitivity to light. Low ISO is clean, high ISO is noisy. On a phone, anything above about 800 starts showing grain, and above 1600 it gets ugly. If you are pushing ISO up, the real answer is more light rather than a higher number.
Aperture controls how much light enters and how shallow the background blur is. On most phones it is fixed, so you cannot change it. On a mirrorless camera, f1.8 to f2.8 gives you the blurred background people associate with professional footage.
The one video rule worth memorising
Set your shutter speed to roughly double your frame rate. Shooting at 30fps, use 1/60. Shooting at 60fps, use 1/120. This is the 180 degree shutter rule, and it produces motion blur that matches how the eye expects movement to look.
Break it and people notice without knowing why. A 1/1000 shutter at 30fps gives you that jittery, security-camera quality that reads as amateur immediately, even though every individual frame is sharp.
Most phone camera apps do not expose shutter speed at all, in which case they handle this for you reasonably well. If you use a manual app like Blackmagic Camera, Filmic Pro or your phone's pro mode, set it yourself.
Set these once and forget them
Open your phone's camera settings and change these today. They apply to everything you shoot afterwards.
- Video resolution and frame rate: 1080p at 30fps for most content. 4K is only worth it if you plan to crop or reframe in the edit, and it eats storage. Instagram compresses everything to roughly 1080 wide anyway.
- 60fps only when you want slow motion or you are filming fast action. Slowing 60fps footage to half speed stays smooth. Slowing 30fps footage does not.
- Grid on. Free composition help, and it keeps horizons level.
- Video stabilisation on. Standard, not the aggressive action mode, which crops heavily and can warp the edges.
- Highest quality capture format. On iPhone that means turning off the space-saving option; on Android look for the highest bitrate or "pro" video option.
- Lens correction on, if your phone offers it. It fixes the bulge on the ultra-wide lens.
- Instagram's high quality upload setting. Not a camera setting, but the same job. In Instagram, turn on uploading at the highest quality, otherwise your careful footage gets processed down.
Set these per shot
These are the ones that ruin takes when you skip them.
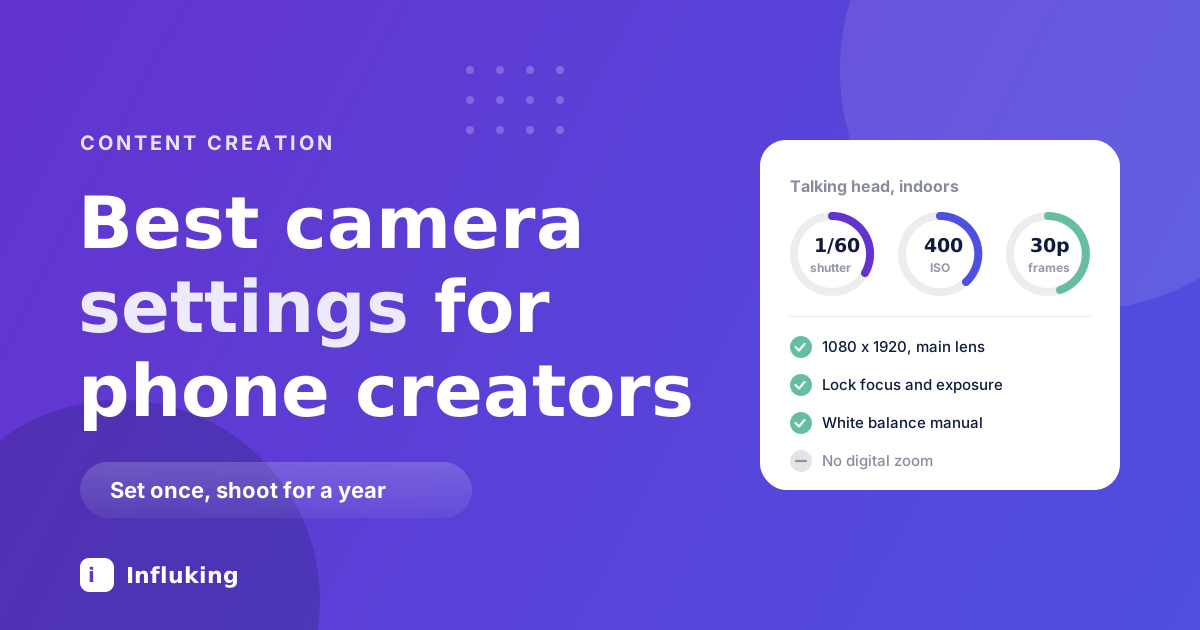
- Lock focus and exposure. Press and hold on your subject until the lock indicator appears. Without this, the camera refocuses every time you move, and the image visibly pulses brighter and darker mid-sentence.
- Nudge exposure down slightly. After locking, drag the little sun icon down a touch. Slightly underexposed footage keeps highlight detail, and you can lift it in the edit. Blown-out highlights are gone permanently.
- Set white balance manually if your app allows it. Auto white balance drifts when you move or when someone walks past a window, which makes your skin tone shift colour mid-shot. Roughly 3200K for warm indoor light, 5600K for daylight.
- Use the main lens. The 1x lens has the biggest sensor and the best image on every phone. The ultra-wide is softer and distorts faces, and the telephoto struggles in low light.
- Never use digital zoom. It is a crop, so you lose resolution. Move closer instead.
- Clean the lens. Genuinely. A fingerprint smear is why half of "why does my footage look hazy" posts exist.
Settings by situation
A quick reference for what you actually shoot.
- Talking head indoors. 1080p30, shutter 1/60, ISO as low as your light allows, white balance locked, face lit from the front. If ISO is climbing past 800, add light rather than raising it.
- Outdoors in daylight. 1080p30, 1/60, ISO 50 to 100. Expose for the face and let the background go a little bright, since a correctly exposed sky with a dark face is a wasted take.
- Golden hour. Same settings, but lock exposure early because the light changes fast, and keep the sun behind or beside your subject rather than in their eyes.
- Food and products. 1080p30, main lens, get close but not closer than about 20cm or the phone cannot focus. Side light rather than front light, because texture needs shadow.
- Fast action or anything you may slow down. 1080p60 with a 1/120 shutter.
- Low light. Cap ISO around 800, drop to 24 or 30fps for a longer exposure per frame, brace the phone against something solid. Accept that a phone in a dark room has limits, and adding one cheap light beats any setting change.
What about log, ProRes and RAW?
Log profiles capture a flat image with more room to colour grade later. ProRes and RAW capture far more data per frame. Both are real advantages if you grade every video in a proper editor and have storage to spare.
For most creators posting several Reels a week, they are a trap. Log footage looks wrong until you grade it, ProRes files fill a phone in minutes, and Instagram compresses the result heavily regardless. Shoot standard, expose well, and spend the saved time on the edit. Revisit this when grading becomes something you enjoy rather than something you skip.
If you shoot on a mirrorless or DSLR
Start in manual video mode with these and adjust from there: 1080p or 4K at 24 or 30fps, shutter at double the frame rate, aperture between f1.8 and f4 depending on how much background blur you want, ISO as low as the light allows, white balance set manually rather than auto, and a picture profile that is neutral rather than heavily contrasted.
Turn on zebras or focus peaking if your camera has them. Zebras show you what is overexposed before you shoot it rather than after, which is the single most useful feature on any camera.
Do not forget the audio
Bad audio kills a video faster than bad footage, and no setting rescues it. Record somewhere without echo, keep the microphone within a metre of the speaker, and use a cheap clip-on mic if people are talking. If you must use the phone's built-in mic, get closer and turn off any wind or noise reduction that muffles voices.
Common settings mistakes
- Shooting everything in 4K60. Bigger files, hotter phone, no visible benefit after Instagram compresses it.
- Leaving autofocus on for a static shot. The hunting is the most obviously amateur artefact there is.
- Filming horizontally then cropping to vertical. You throw away most of the frame. Shoot 9:16 from the start.
- Cranking ISO instead of adding light. Noise cannot be edited out cleanly.
- Auto white balance under mixed lighting. Warm bulbs plus daylight through a window is where auto gives up entirely.
- Beauty filters at capture. Baked in permanently, and they smear skin texture in a way that reads instantly as filtered.
The short version
1080p at 30fps, shutter 1/60, lowest ISO your light allows, main lens, focus and exposure locked, exposure pulled down slightly, white balance manual, no digital zoom, high quality upload turned on in Instagram. That covers the vast majority of what you will shoot.
Settings get you a clean image. What people actually stay for is the edit and the idea, which is where our Reel editing guide and our post on making Reels that travel pick up. When the work is consistently good, Influking matches creators with brands running campaigns in their category.