Give a good creator a five year old phone and good light, and the footage looks professional. Give them the newest phone under a ceiling bulb and it looks like a video call. Light does more for your content than any camera upgrade you can buy, and the entry price is far lower than most people assume.
Here is what to buy at four budget levels, where to put it, and which popular purchases are a waste.
What you are actually trying to achieve
Three things, in this order.
Enough light. Phone cameras are small-sensor devices. In dim rooms they raise ISO, and the image gets noisy and mushy. More light means lower ISO means a cleaner picture, which is a settings problem solved by hardware.
Soft light. A bare bulb produces hard shadows with sharp edges, which is unflattering on faces and unhelpful on products. The bigger the light source relative to your subject, the softer the shadow. This is why a window looks better than a torch.
One direction. Light coming from one main direction creates shape. Light coming from everywhere at once looks flat, and light coming from two different colours looks broken.
Setup 1: free
Before you spend anything, use the window. A large window with indirect daylight is a genuinely excellent light source, and plenty of professional content is shot on nothing else.
- Face the window, with the camera between you and the glass. Never have the window behind you, since the camera will expose for the bright background and turn you into a silhouette.
- Stay a metre or two back from it. Right against the glass is too harsh on one side.
- If direct sun comes through, hang a thin white curtain or a bedsheet over it. That turns a hard light into a soft one instantly.
- Put something white on the shadow side of your face: a sheet of chart paper, a white t-shirt over a chair, a laptop with a white screen. That is a bounce, and it fills the shadow for nothing.
- Turn off the ceiling light. Mixing warm bulbs with daylight gives you two colours on one face, which no editing fixes cleanly.
The catch is obvious: it works between roughly 9am and 5pm, and not at all on a deadline at night. Which is what the rest of this is for.
Setup 2: around ₹1,000 to ₹1,500
The cheapest real improvement is a bright, neutral bulb and something to bounce with.
- A high-wattage LED bulb in a daylight colour temperature, around 5000K to 6500K, in a lamp you already own. A few hundred rupees.
- A foldable 5-in-1 reflector, usually available in the ₹600 to ₹1,000 range. The white side fills shadows, the silver side is punchier, the translucent centre works as diffusion in front of a hard light.
- Baking paper or a white cloth clipped in front of the lamp to soften it. Keep it a few inches away from a hot bulb, and use LED rather than incandescent for this reason.
This gets you shooting at night with a clean, soft key light. It is not adjustable and the lamp will not stand where you want it, which is what the next tier fixes.
Setup 3: around ₹2,500 to ₹3,500
This is where most creators should land. One proper light on a stand, with diffusion.
- An LED video panel or a softbox kit, typically ₹1,500 to ₹2,500 for a usable one. Look for adjustable brightness, adjustable colour temperature, and mains power rather than only batteries. A CRI rating above 90 means colours render accurately, and it is worth checking.
- A light stand, ₹600 to ₹1,000, ideally reaching about 2 metres so you can light from above eye level.
- Diffusion. Softbox kits include it. For a bare panel, a diffusion sheet or the translucent panel from a reflector does the job.
One light, placed properly, is enough for talking heads, food, products and most tutorials. A single good light beats three cheap ones pointed randomly, every time.
Setup 4: the full ₹5,000
Add a second, smaller light and something to control the background.
- Key light: your LED panel or softbox from above, roughly ₹2,000 to ₹2,500 with the stand.
- Fill or rim light: a smaller panel or a clip-on LED, ₹800 to ₹1,500. Use it at low power on the shadow side, or behind you pointing at your hair and shoulders to separate you from the wall.
- Reflector: ₹600 to ₹1,000, still the best value item on the list.
- Cheap background control: a roll of plain paper or a solid cloth for a clean backdrop, or a small RGB light throwing colour on the wall behind you.
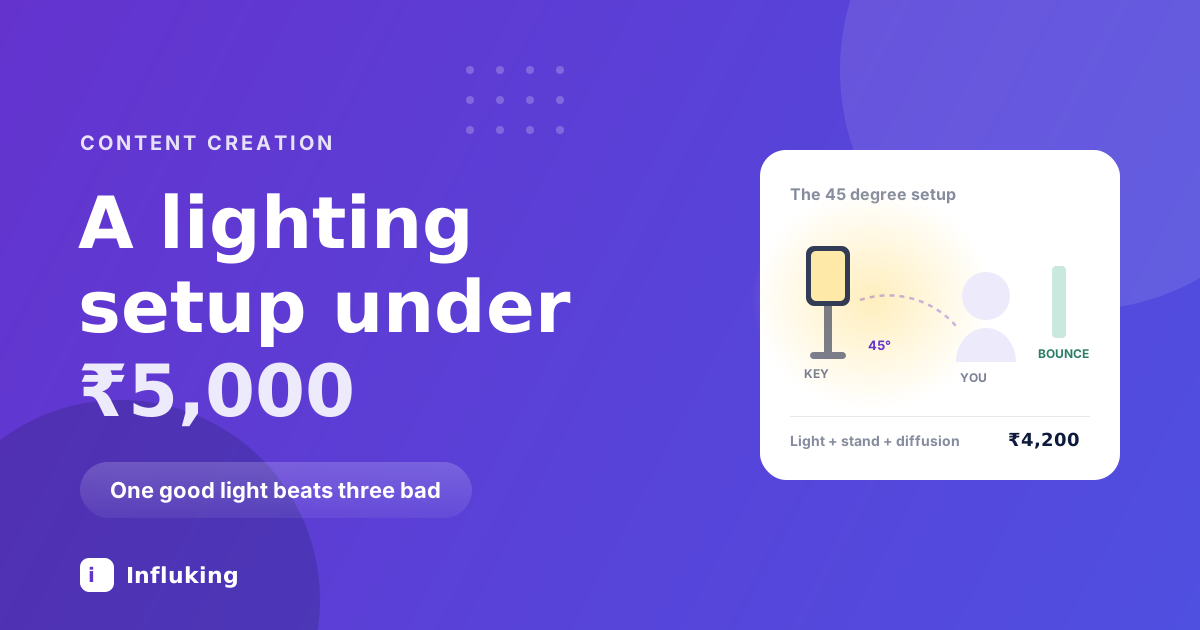
That is a two-light setup with fill and background separation for under five thousand rupees, which handles almost anything you will shoot at home.
Where to put the light
Placement is free and matters more than the equipment.
- Key light at 45 degrees. Put it to one side of the camera and slightly above your eye line, angled down at you. This creates a gentle shadow on the far side of your face, which gives it shape.
- Close it in. The nearer the light, the larger it is relative to you, and the softer the shadows. Just outside the frame is usually right.
- Fill the shadow side. Reflector or a low-powered second light, at about a quarter of the key's brightness. You want the shadow softened, not erased.
- Separate yourself from the background. Either a light behind you clipping your shoulders, or simply standing further from the wall so it falls darker.
- Kill the ceiling light. Overhead light casts shadows into the eyes and under the nose, and it usually fights your key light on colour.
Setups by content type
- Talking head. Key at 45 degrees, reflector opposite, ceiling off. If you wear glasses, raise the light higher and angle it down more steeply so the reflection falls out of the lens.
- Food. Light from the side or slightly behind the plate, never from the front. Side light produces the shadows that make texture visible, and backlight makes drinks and sauces glow. Bounce a white card into the front to lift the shadows.
- Products. One diffused light at 45 degrees plus a white bounce, on a plain surface. Keep the background clean and darker than the product.
- Get ready with me and mirror content. Light in front of you, above the mirror line, so your face is lit and the light itself is out of the reflection.
- Unboxing and desk shots. One light high and slightly behind, one bounce card in front. Overhead alone flattens everything.
What not to buy
- A giant ring light as your only light. It is flat, it puts a distracting circle in every eye, and it is nearly useless for anything other than a face straight on. Fine as a fill, poor as a key.
- Cheap multi-light kits with four tiny panels. You end up with four weak, hard sources instead of one good soft one.
- Coloured RGB strips as your main light. They look great in the background and terrible on skin.
- Battery-only lights for indoor work. They die mid-shoot. Mains power for a home setup, batteries only if you shoot outdoors.
- Anything without adjustable brightness. Full power straight at your face is not a lighting setup.
Mistakes that show up on camera
- Mixed colour temperatures. Warm bulb on one side, daylight window on the other, and your skin goes two colours. Match everything or turn one off.
- Light too far away. Distance makes it harder and dimmer at once. Bring it closer.
- Backlit by a window. The most common bad setup in home content.
- Perfectly even light with no shadow. Technically well lit, visually dull. Shadow is what makes a face look three dimensional.
- Leaving auto white balance on. Fix the light, then lock the setting, as covered in our guide to camera settings.
The order to buy in
If your budget arrives in pieces: reflector first, then one LED panel with a stand, then diffusion, then a second small light. Each step is a bigger visible improvement than any camera you could buy for the same money.
Get the light right and your existing phone will look better than a mirrorless camera in a dark room. From there it is framing and editing, which our mobile photography guide and Reel editing guide cover, and Influking matches creators with brands once the work looks the part.
Prices here are rough Indian market ranges and move around, so treat them as a shape for the budget rather than a shopping list.